
Table of Contents
Asphalt is one of the most reliable and cost-effective paving materials available. When installed correctly, it delivers a durable surface that withstands heavy traffic and changing weather conditions.
In this guide, we break down the key steps in the asphalt paving process, from site preparation to final compaction. Understanding these stages can help property owners and contractors prevent costly repairs, extend pavement life, and get the most value from their investment.
What Is Asphalt Paving and Why Does It Matter?
Asphalt paving is a mixture of bitumen (a petroleum-based binder) and aggregates such as crushed stone, sand, and gravel. When heated and combined, these materials form a flexible surface that can handle heavy traffic while adapting to changing weather conditions.
One reason asphalt is widely used for parking lots, roads, and driveways is its strength and flexibility. Unlike rigid materials, asphalt can expand and contract with temperature changes, which helps reduce cracking and structural damage over time.
The success of any pavement project depends on a proper asphalt paving process. Proper site preparation, base installation, and compaction all work together to create pavement that lasts longer, performs better, and requires fewer repairs.

Step-By-Step Asphalt Paving Process
The process of paving asphalt includes several structured steps to ensure the finished surface is stable, smooth, and built to last. From preparing the site to completing the final inspection, each phase plays an important role in creating pavement that can withstand traffic, weather conditions, and long-term use.
Here’s how the asphalt paving process works:
1. Site Evaluation and Project Planning
Every paving project begins with a detailed site inspection. Contractors evaluate the soil conditions, existing pavement, drainage patterns, and traffic requirements before work begins.
During this phase, paving professionals also:
- Measure grading and slope requirements
- Identify drainage solutions
- Determine pavement thickness based on expected traffic
- Plan material quantities and equipment needs
A proper evaluation ensures the project is designed correctly before construction begins.
2. Excavation and Subgrade Preparation
After planning is complete, crews prepare the site by removing old pavement, debris, and unstable soil. This step exposes the subgrade, which is the soil layer that supports the entire pavement structure.
The subgrade must be:
- Properly graded
- Compacted using rollers or compactors
- Stabilized if weak soil conditions exist
If the subgrade is not prepared correctly, the pavement can settle, crack, or develop potholes much sooner than expected.
3. Installing Base and Sub-Base Layers
Once the subgrade is stable, contractors install the base layers that provide structural strength. These layers are typically made from crushed stone, gravel, or recycled aggregate.
The base layer serves several important functions:
- Distributes vehicle loads across the pavement
- Provides drainage beneath the asphalt surface
- Prevents soil movement and shifting
After the aggregate is placed, heavy rollers compact the material to create a dense and stable foundation.
4. Asphalt Mixture Selection
Choosing the right asphalt mix is an important part of the process of asphalt paving. Different mixes are designed to perform in specific environments and traffic conditions.
Additionally, the thickness of asphalt layers also varies depending on the surface type. Lower traffic areas usually require thinner layers, while commercial lots and roadways require thicker structural pavement to support heavier vehicles.
Common asphalt mixes include:
- Hot Mix Asphalt
The most common paving material used for roads and parking lots due to its durability and strength. - Warm Mix Asphalt
Produced at lower temperatures, making it more energy efficient and environmentally friendly. - Cold Mix Asphalt
Typically used for temporary repairs or small patching projects.
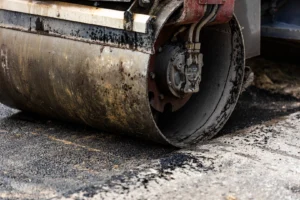
5. Asphalt Placement and Compaction
Once the base is ready and the asphalt mixture is chosen, paving crews begin installing the asphalt using specialized paving machines.
The paver spreads the hot asphalt evenly across the prepared surface while maintaining the correct depth and slope. Immediately after placement, crews use rollers to compact the asphalt and remove air pockets.
Proper compaction:
- Improves pavement strength
- Prevents water infiltration
- Creates a smooth, even driving surface
Temperature control is also important during this stage. Asphalt must be compacted while it is still hot enough to bond correctly.
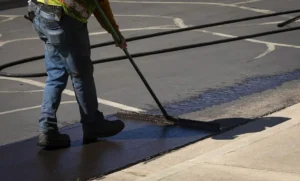
6. Joint Sealing and Edge Finishing
After the asphalt surface is compacted, contractors complete the final finishing details. This includes sealing edges, filling joints, and creating smooth transitions between the pavement and nearby surfaces such as curbs and sidewalks.
On many projects, asphalt surfaces connect to concrete curbing that helps guide water drainage and protect the pavement structure.
Proper edge finishing also helps prevent early cracking and improves the overall durability and appearance of the pavement.
7. Final Inspection and Quality Check
The final step in the paving asphalt process is a complete inspection of the finished surface. Contractors review the pavement to ensure it meets design specifications and quality standards.
During this stage, crews check for:
- Surface smoothness
- Proper drainage and slope
- Consistent pavement thickness
- Compaction levels and structural integrity
Once the inspection is complete, the pavement is ready for curing before normal vehicle traffic can resume.
Get Expert Asphalt Paving Help Today
Common Challenges and Mistakes in Asphalt Paving
Although asphalt is durable, several common mistakes can shorten pavement lifespan if the installation process is not followed correctly.
Some of the most common paving issues include:
- Poor subgrade preparation that allows pavement to shift or settle
- Improper compaction, which weakens the asphalt surface
- Incorrect asphalt mix selection for the project environment
- Drainage problems that allow water to damage the pavement structure
Working with experienced paving professionals helps prevent these issues and ensures the asphalt paving process is performed correctly from the start.
Asphalt Maintenance and Longevity Tips
Even with a proper asphalt paving process, paved surfaces still require ongoing maintenance to preserve their integrity and lifespan. With proper care, asphalt pavement can last 15 to 25 years or more, depending on traffic levels and local climate conditions.
Regular inspections and preventive maintenance can help extend pavement life and significantly reduce long-term repair costs.
Property owners can help protect their pavement by following a few key maintenance practices:
- Sealcoating asphalt every few years to protect it from water damage and oxidation
- Sealing cracks to prevent moisture from reaching the base layers
- Removing debris and keeping the surface clean
- Repairing potholes and surface damage as soon as they appear
Asphalt vs. Other Paving Options
When planning a paving project, there are many paving materials to choose from. From asphalt and concrete to pavers, each option has advantages depending on budget, installation speed, and maintenance requirements.
Pavement Type | Installation Speed | Cost | Maintenance | Durability |
Asphalt | Fast installation | Lower upfront cost | Requires sealcoating | Easy to repair |
Concrete | Slower installation | Higher upfront cost | Minimal maintenance | More difficult to repair |
Pavers | Moderate installation | Highest cost | Joint maintenance required | Moderate repairs |
Asphalt is often the preferred choice for commercial lots and roadways because it offers a balance of durability, cost efficiency, and quick installation.

Choosing the Right Asphalt Contractor in Indianapolis, IN
Selecting the right asphalt contractor is crucial for ensuring a long-lasting, high-quality pavement. Professional installation not only creates a smooth and durable surface but also helps reduce long-term repair costs by preventing common issues like cracking, potholes, and uneven settling.
When choosing a paving contractor, look for the following:
- Proven experience with asphalt paving projects
- Modern paving equipment and trained crews
- Positive customer reviews and references
- Clear project timelines and warranties
At Sipes Asphalt and Concrete, our team combines years of experience with state-of-the-art equipment to deliver a top-notch asphalt paving process in Indianapolis. From commercial lots to municipal projects, we prioritize quality, reliability, and results that last.
Schedule Your Asphalt Paving Project With Sipes Asphalt & Concrete Today
Every successful asphalt paving project starts with the right team. At Sipes Asphalt & Concrete, we are proud to be the leading asphalt paving company throughout Indianapolis. Our team delivers durable, high-quality paving solutions for commercial properties, roadways, and parking lots.
Our team provides expert guidance, durability, and timely project completion at every step of the asphalt paving process. We ensure every project is completed with precision and built for long-term performance.
Call us today at (317) 746-6125 to schedule a consultation to start your next asphalt paving project.
Frequently Asked Questions
1) How long does asphalt paving last?
Most asphalt pavement lasts between 15 and 25 years, depending on traffic levels, climate, and maintenance practices. Regular sealcoating, crack repairs, and routine inspections can extend pavement lifespan.
2) Can I pave over existing asphalt?
In some cases, contractors can install an asphalt overlay over existing pavement if the underlying structure is still stable. However, if the base layers are damaged or drainage issues exist, full removal and reconstruction may be necessary.
3) How long should I wait before driving on new asphalt?
New asphalt typically needs 24 to 48 hours to cure before vehicles can drive on it. Heavy trucks or commercial traffic may require additional curing time depending on weather conditions.
4) What maintenance is required for asphalt?
Routine asphalt maintenance typically includes crack sealing, sealcoating every few years, pothole repairs, and regular cleaning and inspections. Preventive maintenance helps protect the pavement structure and reduces long-term repair costs.